Tutorial
Chart guide
This guide explains how to follow and read crochet charts. Understanding how crochet charts are structured will help streamline and speed up your crochet process.
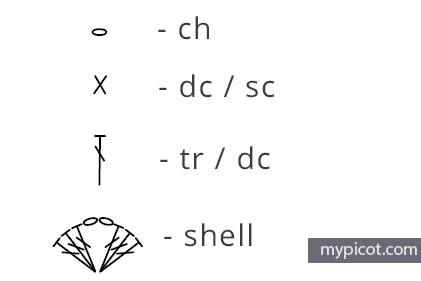
UK / US key
In all our charts and instructions, we use both UK and US crochet terminology. Please refer to the UK / US key for decoding. For example, tr / dc represents the same stitch, which means treble crochet in UK terminology and double crochet in US terminology.
How to follow and read crochet charts
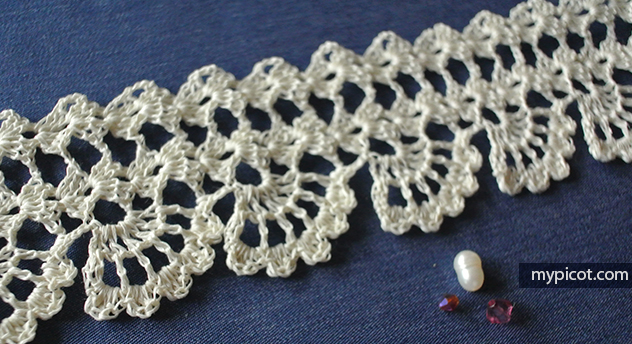
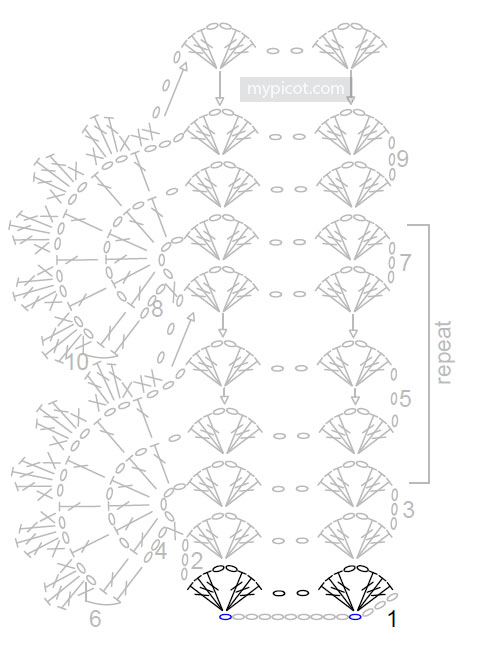
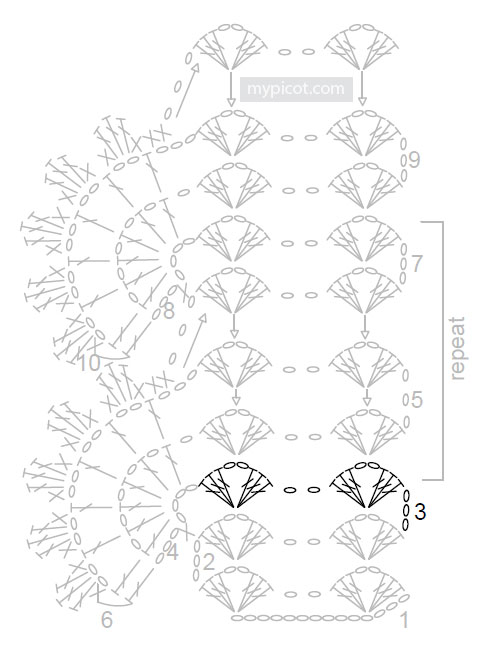
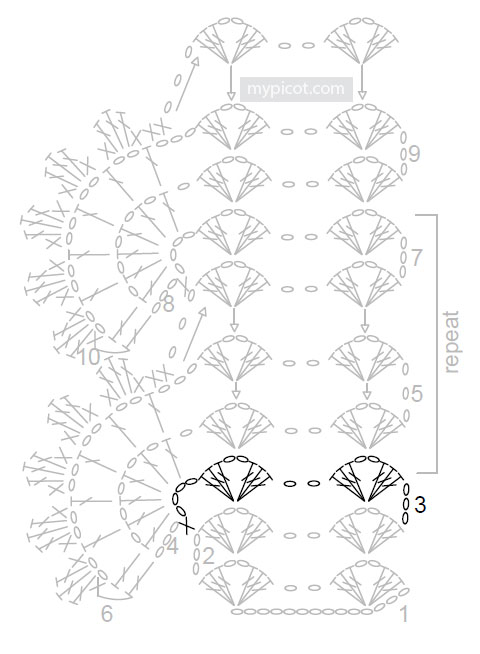
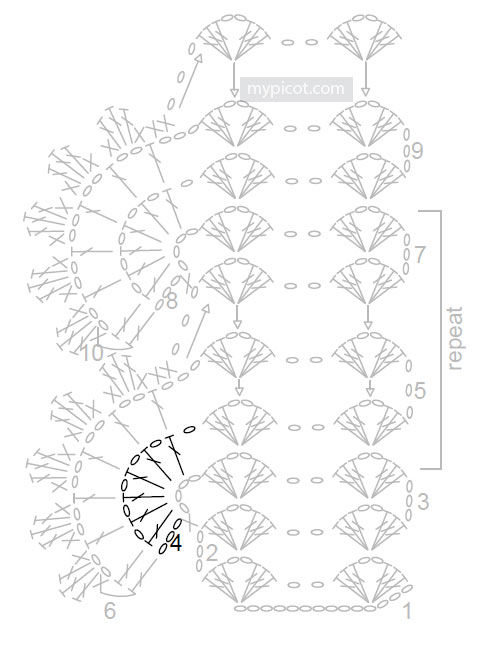
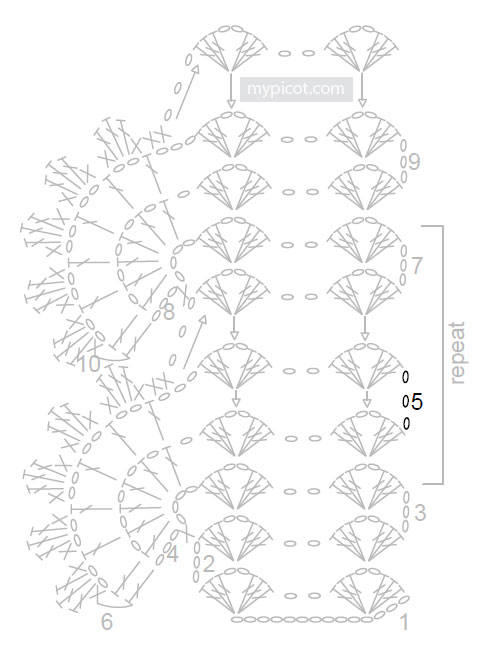
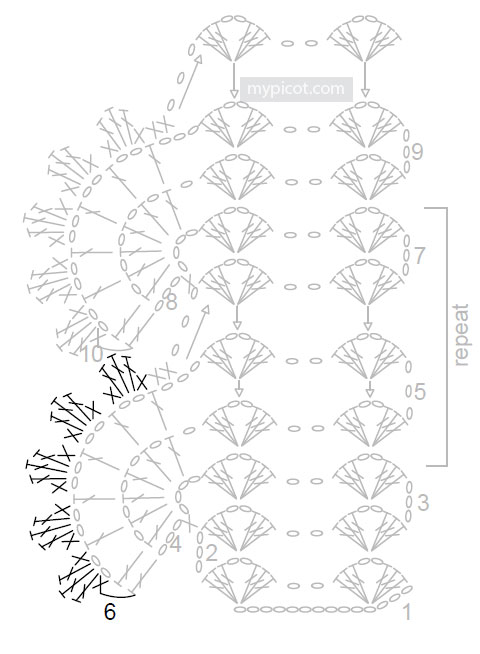
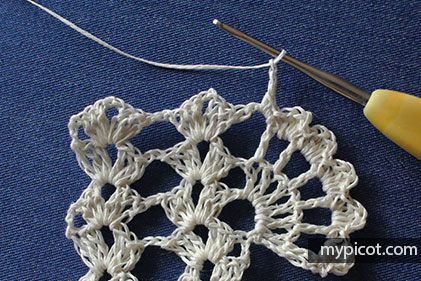
For this tutorial, we will use a crochet chart and instructions for Narrow prospect lace 👒
Step 1
Familiarize yourself with our symbols and abbreviations
Each symbol in our charts represents a specific stitch or technique. Be sure to refer to our Symbols & Terms page, which provides a comprehensive list of the symbols and abbreviations used in our patterns.
Step 2
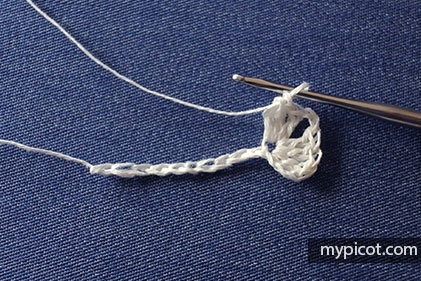
Starting point
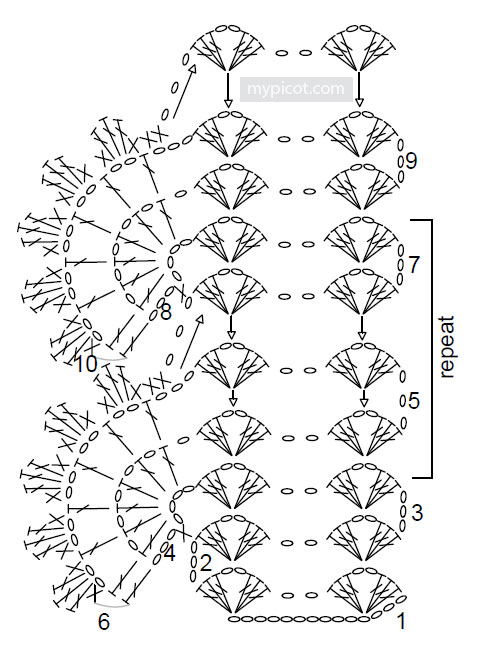
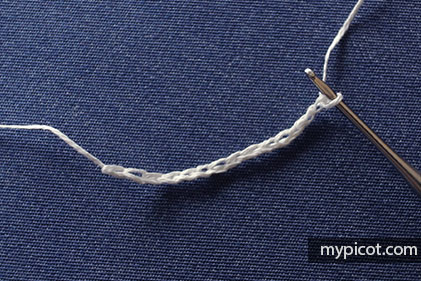
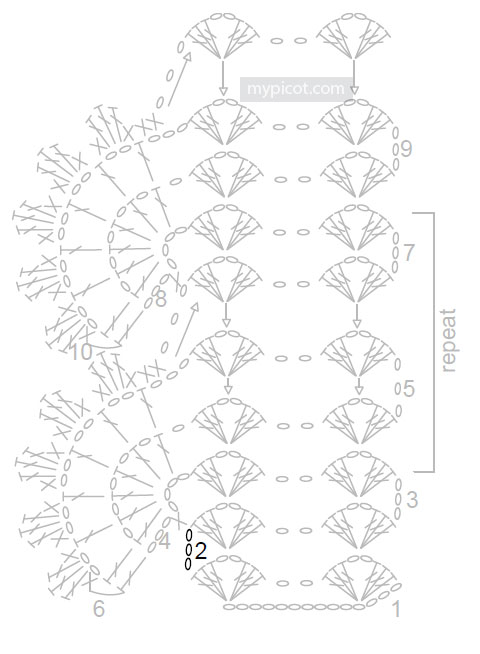
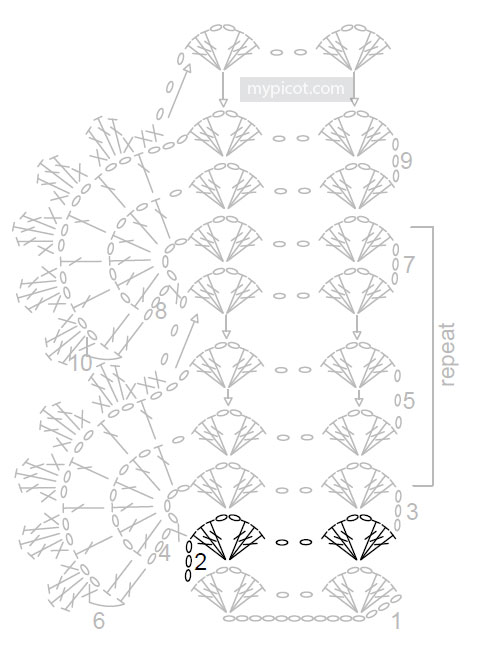
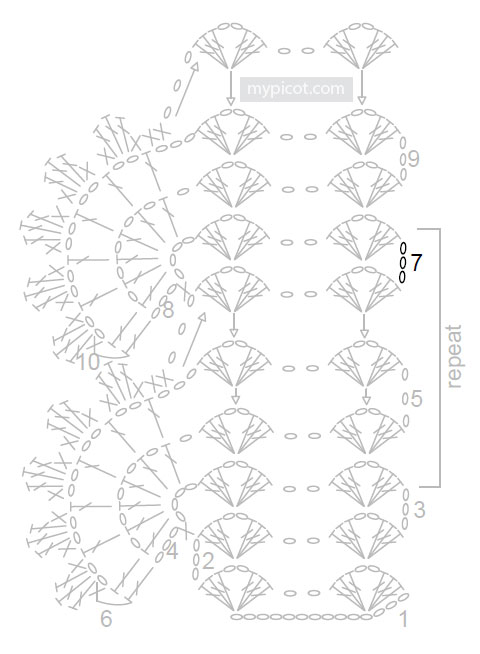
Start by making 14 chain stitches as indicated in the chart. The number 1 denotes the first row of the lace.

Step 3
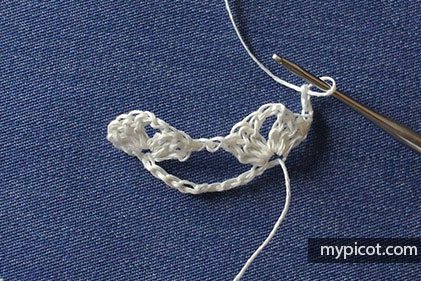
Row 1
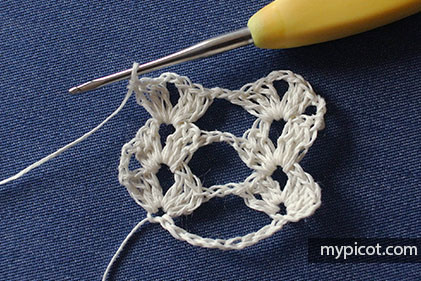
The chart indicates that in the first row, you need to crochet two shells with two chain stitches between them. The first shell is crocheted into the fourth chain from the hook, and the second shell into the last chain (highlighted in blue on the chart).
Instructions: skip 3 ch, work first shell: 3 tr/dc + 2 ch + 3tr/dc in next ch.

Step 4
Make 2 ch, work second shell in last ch.
Step 5
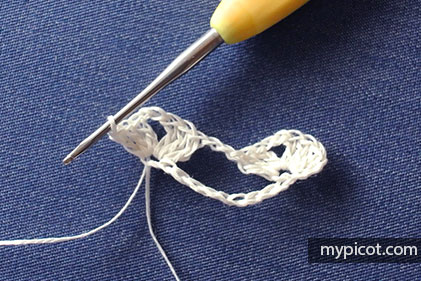
Row 2
The second row of the lace is marked with the number 2 on the chart. At the beginning of the row, make 3 turning chains.
Instructions: Turn and make 3 ch.
Step 6
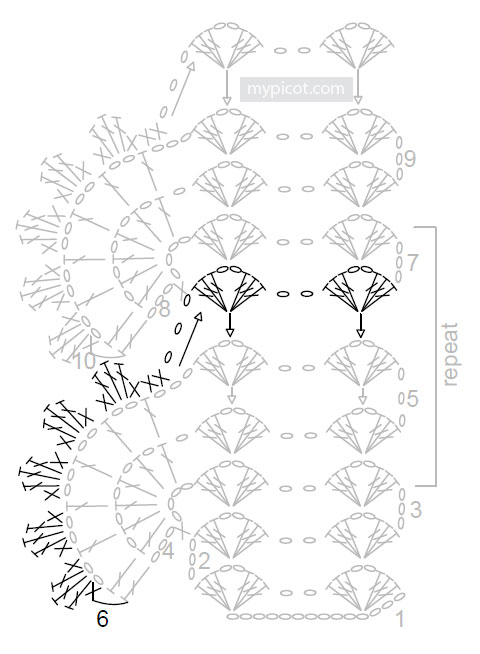
The chart shows that in the second row, you also need to crochet two shells with two chain stitches between them. In this row, the shell is crocheted into the chain space of the shell below.
Instructions: make shell in shell, 2 ch, shell in shell.

Step 7
Row 3
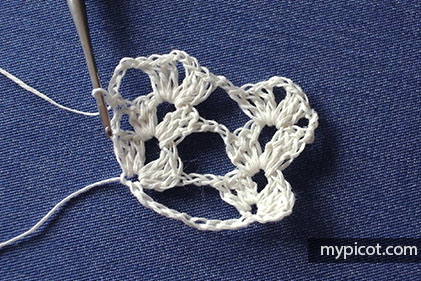
Instructions: turn and make 3 ch.
Step 8
Instructions: make shell in shell, 2 ch, shell in shell.
Step 9
The chart shows that next, you need to create a chain space of 4 chain stitches, which marks the beginning of forming the large edge shell of the lace.
Instructions: work 4 ch and 1 dc/sc in third ch of Row 2.
Step 10
Row 4
Starting from the fourth row, the large shell starts to form. The chart shows that you should start by making 3 turning ch, and then crochet 6 tr / dc stitches with 1 ch between them.
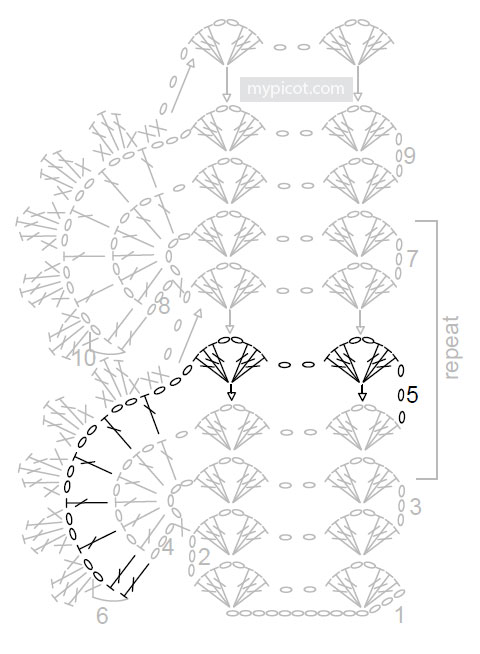
Additionally, the fourth row begins the repeating pattern section, which is indicated on the chart with a large bracket and the word "repeat".
Instructions: turn and make 3 ch, [1 tr/dc + 1ch in space of 4 ch] - make 6 times.
Step 11
The chart shows that to complete this row, you need to crochet two shells again, with two chain stitches between them.
Instructions: make shell in shell, 2 ch, shell in shell.
Step 12
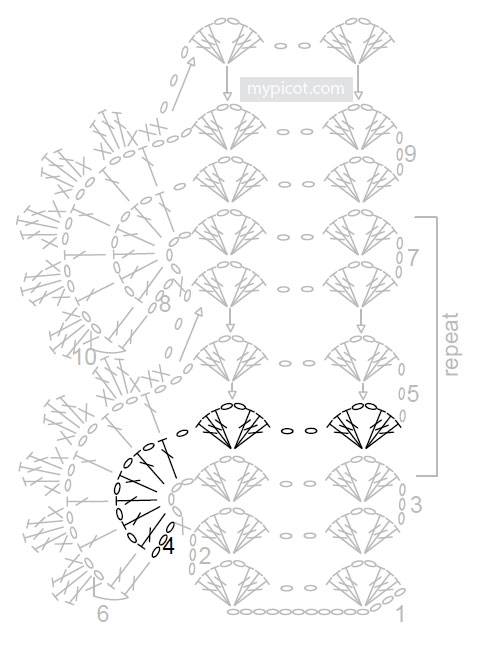
Row 5
Instructions: turn and make 3 ch.
Step 13
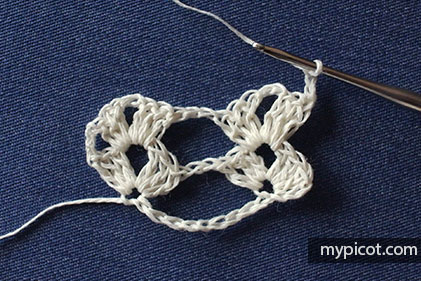
The chart shows that in the fifth row, you need to repeat two shells and continue working on the large edge shell of the lace pattern.
Instructions: make shell in shell, 2 ch, shell in shell, 3 ch, work 1 tr/dc + 2ch in each of next 5tr/dc below, make 1 tr/dc in last tr/dc below and 1 tr/dc in third ch.
Step 14
Row 6
In the sixth row, the large shell is completed with a scalloped edge. To do this, crochet a group of tr/dc and dc/sc into each chain space of 2ch.
Also, note that for this row, the lace design does not require turning chains. If this is challenging for you, you can make 1 turning ch for convenience.
Instructions: turn and work 1 dc/sc + 3 tr/dc + 1 dc/sc in each space of 2 ch.

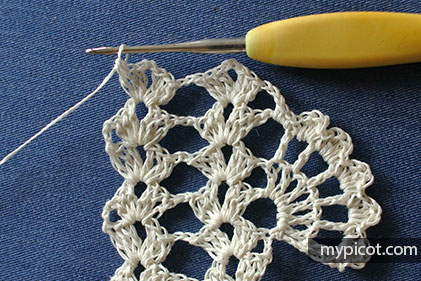
Step 15
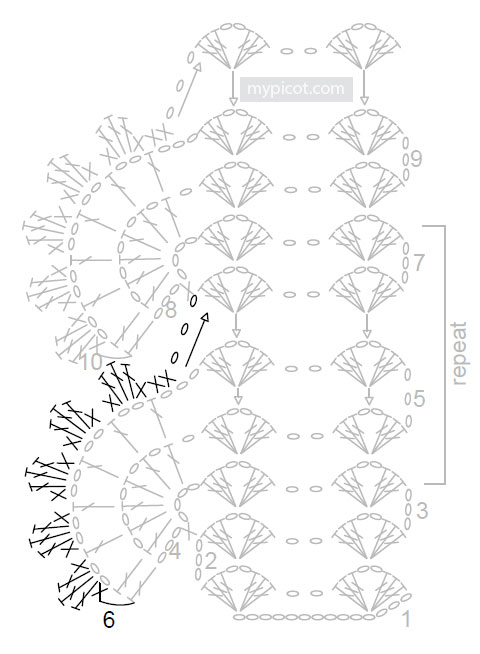
Continue following the chart, completing the large shell and moving on to the small shells. The large arrow on the chart indicates the direction of crochet.
Instructions: work 2 dc/sc in space of 3 ch + 3 ch.
Step 16
Instructions: make shell in shell, 2 ch, shell in shell.
Step 17
Row 7
Instructions: turn and make 3 ch.
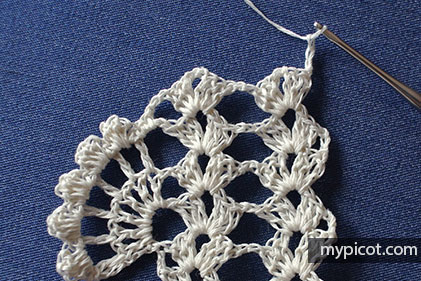
Step 18
The seventh row is the final row in the repeating pattern section. It is similar to the third row and marks the beginning of forming the second large edge shell of the lace.
Instructions: make shell in shell, 2 ch, shell in shell, 4 ch, 1 dc/sc in third ch of Row 6.
Repeat rows 4 - 7 until you have reached your desired length of lace.

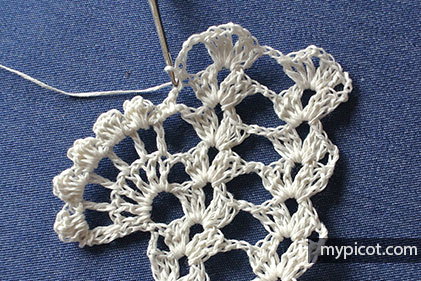
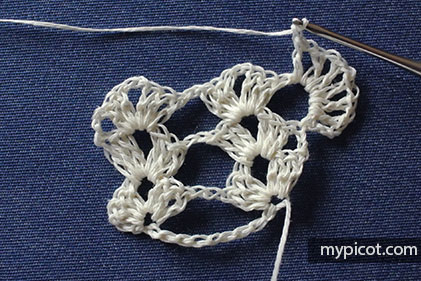
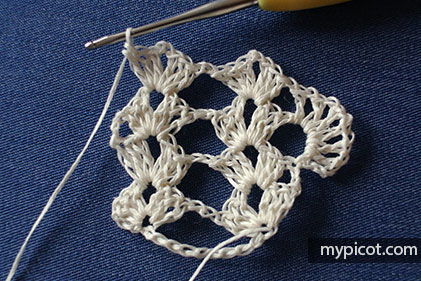
You've now mastered the essentials of this beautiful lace pattern. Keep exploring, experimenting, and enjoy the journey of crochet. Happy crafting! 🌟🧡
Next Tutorial
Symbols & Terms
Here, you'll find a guide to understanding the basic symbols and terms used in our crochet stitch patterns.